


- Contents
Zendesk Screen Pop Connector Help
Add a Zendesk Screen Pop Connector
Note: The year and release in the connector name indicates the minimum supported version of the CIC server. For example, a connector with 2015R2 in the name requires a CIC server that is 2015R2 or newer.
Prerequisite: Before setup, purchase the connector and then follow the steps to access it (login required).
To add a new connector group:
-
In PureCloud, click Admin.
-
Under Integrations, click Bridge
-
Click the Connectors tab.
-
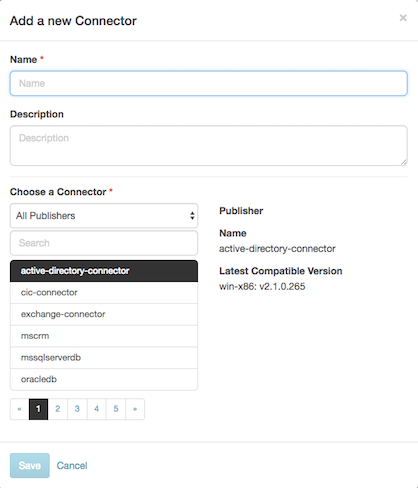
Click Add a Connector. A pop-up window appears.
-
Enter a name. The name must not contain any spaces but can include hyphens. This name appears as the Group Name on the Manage Connectors page.
Use unique names. Unique names differentiate multiple connector groups of the same connector type from one another. For example, if you create two connector groups for the Zendesk Screen Pop Connector, name them ZendeskSPGroup1 and ZendeskSPGroup2.
You can use multiple connector groups of the same connector type but with different configurations for different parts of your organization, such as Support and Sales. Be sure to link the connector instances in both connector groups to the same Bridge Server.
-
Choose the connector you want from the list provided.
-
Choose the Platform and Version. By default, the latest version is selected.
-
Click Save.
-
The Connector Details page appears. If you want to use the same connector type but with different configurations, repeat the steps to add another connector group.
Note: Upgrades to PureCloud and its connectors occur regularly. You can easily upgrade an existing version of the Zendesk Screen Pop Connector.
-